I’m helping out on an internal project and we’re kicking into overdrive with neat, fun things, such as Universal Tracker. What should we do?
Step 1: Install Universal Tracker
Step 2: ???
Step 3: Profit!

So I did what anyone new to Sitecore would do. I trusted the documentation. Now, before you laugh out loud, I will say: the documentation had a lot of things right. In fact, if not for the documentation, I wouldn’t have been able to install things. So what went wrong? Better, yet, how about we take it from the top:
Step 1: Actually download the documentation – This sounds silly. But if you think you can get this installed without some of the documentation, then yeah…not so much. Read the documentation. It has you doing things like unzipping files and shit. This is important, believe it or not. I’m not kidding. Read it.
Step 2: Follow the documentation Step 4.1 through Step 4.5 (Prepare the deployment parameters)
*Gotcha* In step 4.1, you’ll want to likely use the “-AllowClobber” switch to force Azure PS to install. It’ll balk halfway through and you’ll miss some key Cmdlets in there, otherwise.
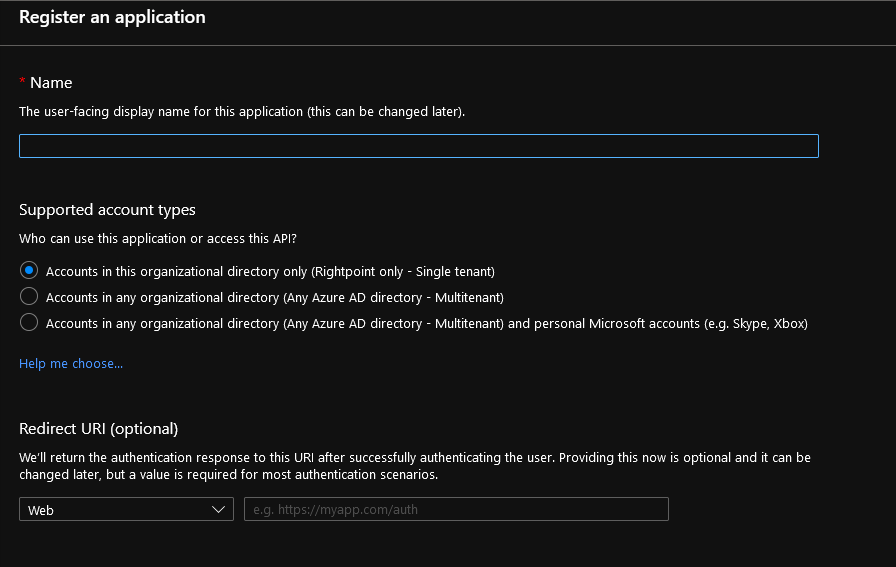
*Gotcha* In step 4.3, the creation of the App Registration screen is different than in the documentation. It looks like this, and you only need to give it a name. Keep it simple, peeps:
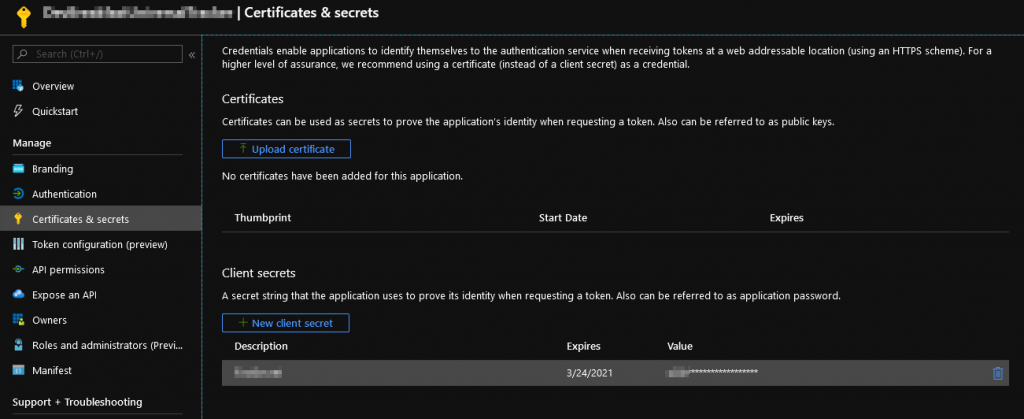
*Gotcha* In step 4.5, the creation of the Key has changed. Click on your App Registration, and then on the “Certificates & Secrets” item. Then click New Client Secret to generate the code you’ll need. Like the doc says, snag this now and save it. It’ll be obscured when you leave the screen.
Step 2: Gather your parameters. There’s a lot going on here and I’ll try to put as much as I can into writing here with some steps on how to get to them. This is going to be accurate of this writing, but likely will change as Azure does its Azure thing, irrespective of the tears we shed over it.
Here’s a list you’ll want to gather before you actually start:
Azure Subscription Id: Pretty easy. Click Subscriptions and then grab the Id
Tenant Id: This one is also pretty easy. Click on Azure Active Directory (AAD) and find your Tenant Id on the Overview screen.
Client Id: The ID from the App Registration you created in documentation Step 4.3
Client Secret: This is the Value you saved from documentation Step 4.5. You kept that, right? I hope so. 🙂
Resource Group Name: Where are you putting these app services?
Resource Group Location: Should be the same as your Resource Group
Some SQL Parameters: SQL Server name, SQL Database name, SQL Admin User Name, SQL Admin Password – These should be somewhere…
Step 3: Modify some files. In your folders you unzipped, you’ll see some json files inside the templates folder. You need to update these.
The first one you’ll need to touch is storageDeploy.parameters.json. in the “name” attribute, set a value. It should only have numbers and lower case letters! Do NOT add any fancy shit in here. Seriously, it’ll break. Also, this needs to be the same for both Processing and Collection. (the script is going to upload the wdp to this location). If you’re concerned about cost, you can likely delete this storagecontainer when all is said and done.
Next you need to update the serviceDeploy.parameters.json. You’ll be updating the webAppName value here with a unique name (not the same for both processing and collections) to give to your webapps.
Step 4: Run a whole mess of Powershell in one fell swoop!
.\deployAllAzure.ps1 -subscriptionId "SUBID" `
-azureSecurityKey "Client Secret" `
-azureClientID "Client Id" `
-azureTenantID "Tenant Id" `
-targetServerName "SQL Server Name" `
-targetUser "SQL Admin" `
-targetUserPassword "SQL Password" `
-licenseXmlPath <Full Path to>\license.xml `
-collectionWdpPackagePath <Full Path to>\Sitecore.Tracking.Collection.Service.2.0.0-r00049.262.wdp.zip `
-collectionInfrastructureDirPath <Full Path to Unzipped Collection deploy>\AzureDeploymentInfrastructure\ `
-processingWdpPackagePath <Full Path to>\Sitecore.Tracking.Processing.Service.2.0.0-r00074.422.wdp.zip `
-processingInfrastructureDirPath <Full Path to Unzipped Processing deploy>\AzureDeploymentInfrastructure\ `
-sourceDacFile <Full Path to>\Sitecore.Tracking.Azure.dacpac `
-sqlInfrastructureDirPath <Full Path to Unzipped Sql Infra>\AzureDeploymentInfrastructure\ `
-resourceGroupName "Resource Group Name" `
-resourceGroupLocation "Resource Group Region" `
-targetDatabaseName "SQL DB Name" `
-storageContainerName "Storage Container Name"
So a ton of notes about THIS sucker. It didn’t work for the first…oh… 20 times I ran it. Here’s some gotchas all in one:
- The DirPath variables (collectionInfrastructureDirPath and processingInfrastructureDirPath) need to include a subfolder “AzureDeploymentInfrastructure” or else you’re gonna get an error.
- sourceDacFile needs to include the filename of the azure dacpac, NOT the folder its in.
- sqlInfrastructureDirPath needs to include “AzureDeploymentInfrastructure”
- You might see a message like “Unable to connect to master or target server ‘YOUR DB’. You must have a user with the same password in master or target server ‘YOUR DB’. I have no earthly idea what that was about, but I got around it by running the dacpac manually on my DB. If you have questions on how to do this, hit up the Google.
- storageContainerName should match what you used when modifying the storageDeploy.arameters json files above.
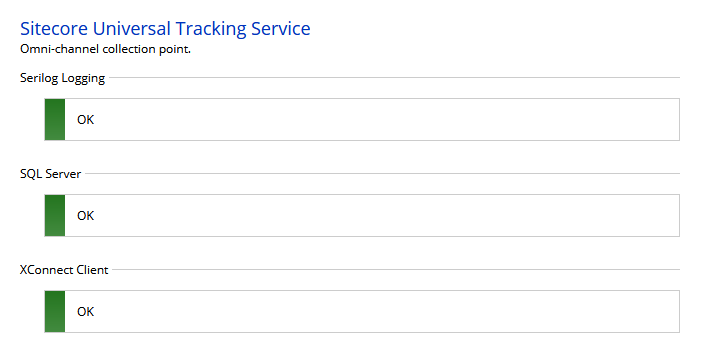
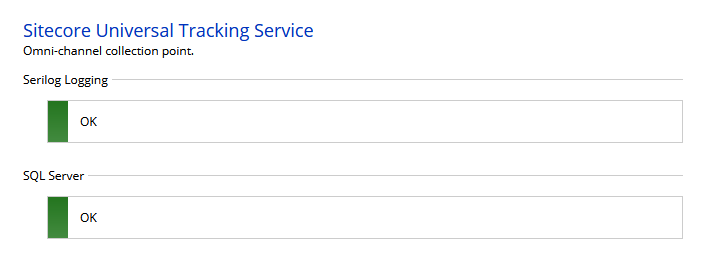
Step 5: Check your server status. You can visit <url>/status for both Processing and Collection. If you don’t see all green (and you probably won’t) then you need to keep going. If you don’t see any status, then hit the documentation in section 7.1. It’ll help you out.
*Gotcha* Make sure you restart your AppService after any change. These changes are not automatically applied when you save the file. Yay.
Step 6: Update the xConnect connection string:
- In your Processing Server, open up “/sitecore/Sitecore.Tracking.Processing.Engine/Config/config.xml”
- Set the ServiceUrl to that of your xConnect Server
- Update the “FindValue” with the correct thumbprint of the xconnect certificate. I snagged this from my XP ConnectionStrings.config because…resourceful
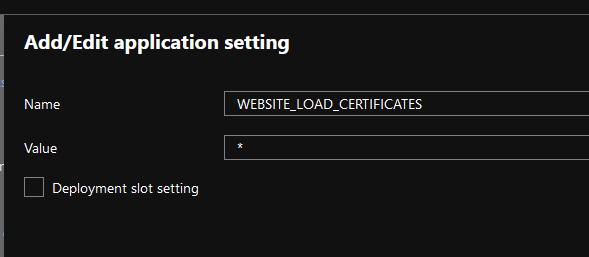
Step 7: Enable your processing Server to load in all certs, which for some reason isn’t set by default.
- Open your Processing Service AppService
- Click Configuration
- Add a New Application Setting:
- Name: WEBSITE_LOAD_CERTIFICATES
- Value: *
- Restart. Your. AppService
After that, you *should* be good to go, and see the following:
You can download the 2.0 installation guide here: https://dev.sitecore.net/Downloads/Sitecore_Universal_Tracker/2x/Sitecore_Universal_Tracker_200.aspx