I’ll start off that this entry isn’t inherently specific to Sitecore. It’s more of an Azure exercise in Principle of Least Privilege (PLP). So, let’s talk about a couple baselines here:
What’s Azure Key Vault?
Azure Key Vault is a service/product offered within Azure. It allows for the storage of Key, Secrets and Certificates. Each Key/Secret has its own versioning, and you can update, expire, retire, delete and manage these secrets in one central location. There’s some nifty under-the-hood work that Azure does with this, to make it accessible.
Why Key Vault?
- Permissions. You can lock down a Key Vault independently of your App Services. Want your pull files off the server, but not have access to connection strings? Key Vault. Want your certificates managed in one single place where no prying eyes can get them? Key Vault. This all boils down to that PLP I mentioned earlier.
- Centralization. Not only is your Key Vault the central place to story secrets, but if you’re using it for something like a connection string, imagine updating it in one place for all your App Services (and we know there’s more than one for an XP topology).
- Lifecycle. You can set secrets to expire at a certain time. You can disable them altogether (if compromised, for example). It’s all there.
- Cost. It’s dirty cheap to use. Right now, the current price is $.03USD/10,000 transactions (basically reads). The great news is that there’s a caching mechanism in place and you’re only using a transaction every time your AppService Starts. So, pennies per month for more security.

Ok, how do I do it?
It’s essentially a five step process:
- Remove your connection strings from your connectionStrings.config
- Add them to your KeyVault.
- Update your AppService Configuration
- Setup a System Assigned Identity for your App Service
- Add an Access Policy to your Key Vault
First, Sitecore has a great article about getting your connection strings out of the file system. Check it out. Follow the part up until steps until you’re about to paste that connection string in Azure. Do yourself a favor and pop open a notepad and keep these open for now.
Second, you’re going to open up your Key Vault in another tab. Click on Secrets and then Generate/Import at the top. Fill in the Name and Value. Name is going to have to be unique. I like to prefix my connection strings with “ConnectionString-” for easy scanning. The Value should be that connectionString itself. Click Save
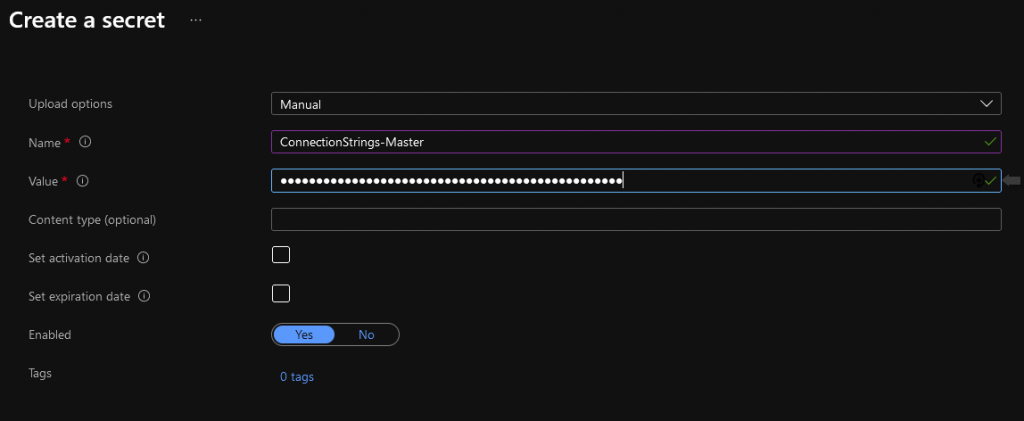
That’s not actually a connection string. It’s my password, hunter2.
Thirdly, you’re going to add it to your AppService. Click on your newly created Secret and look for the Secret Identifier (you’ll need to click on the Version, first)
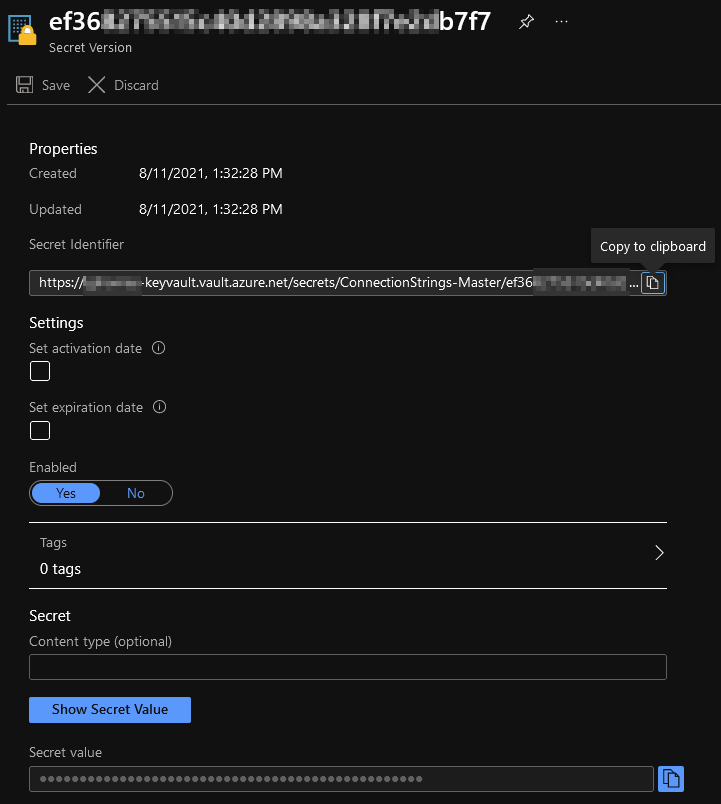
With your Secret Identifier in hand, you’re going to head to your AppService and add a Connection String (under the Configuration blade). Then you paste in the following:
@Microsoft.KeyVault(SecretUri=SECRET_IDENTIFIER)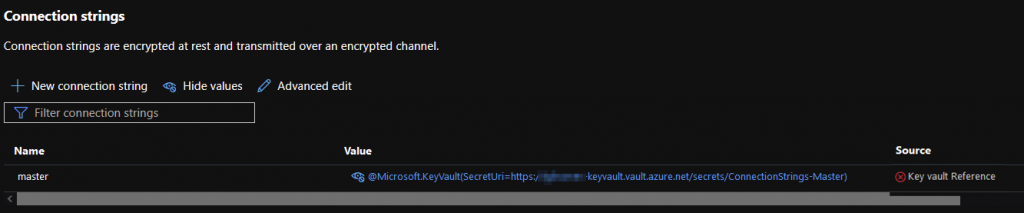
Notice I’ve removed the version ID from the string. This is a relatively new feature that allows you to update your Key Vault Secret and not break everything. If you do use the version ID in here, every time you update your Secret, you’ll need to update your connection string value here. It’ll get tedious, trust me.
Once you’ve done that with all your connection strings, it’s time to save. Then give the sucker a quick refresh. You’ll likely see something like this:
That red Key Vault Reference means that something is amok. What is it? Well, by default (and rightly so) nothing has access into your Key Vault. Nothing. Not even your App Services. It’s a two-step process to do this. Proceed!
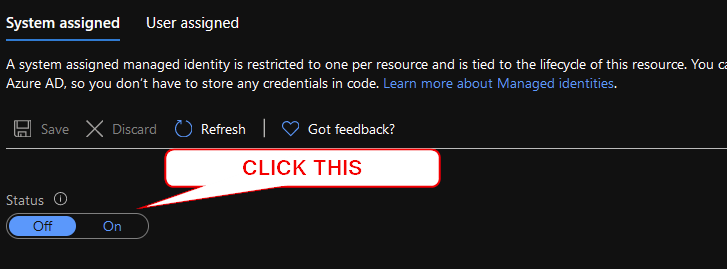
Step four is pretty easy. You’re going to give your App Service an identity.

That’s straightforward in that you need to go to your App Service, and click on Identity. Under System assigned, click “On”. You’ll get a dialog about joining Azure AD, which is lovely. Do it!
Once that is done, click Save. Coming back to the screen, you should see a GUID in place:
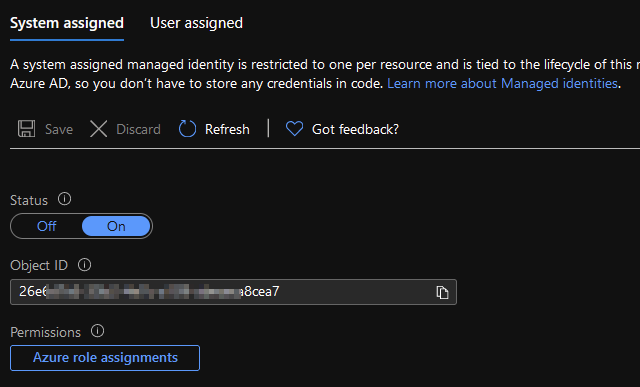
Copy that sucker and move on to the final step.
Ok, for Step 5, we’re going to head back to your Key Vault and add an Access Policy. This tells your Key Vault that you’re ok with that App Service (Which is now identifiable) getting in the door. Once you’ve gone into the Access policies blade of your Key Vault, you’ll see the following screen:
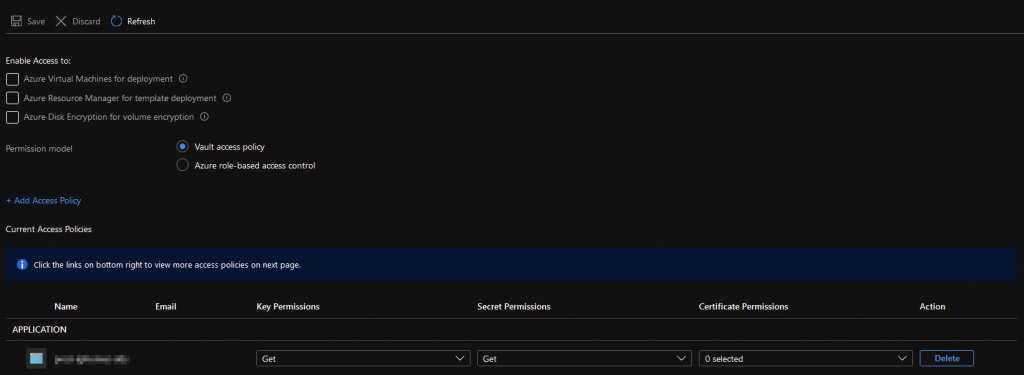
This list will enumerate all the “things” that can get int your Key Vault. Click on the text “+ Add Access Policy” and then make it look like this:
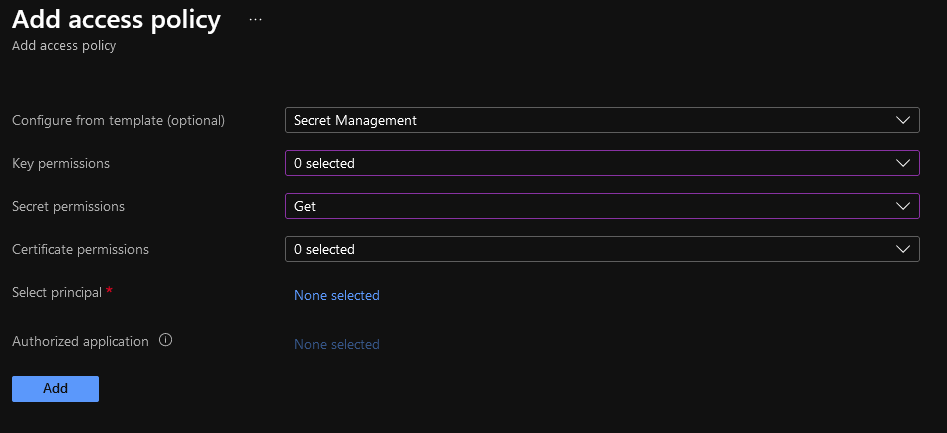
For your “Select principal” you’re going to paste in that GUID from the App Service Identity. Why you can’t search by App Service Name, I don’t know. It just doesn’t work like that. You should now be back to your Application List, and your new App Service is showing up in the list.
MAKE SURE YOU CLICK SAVE.

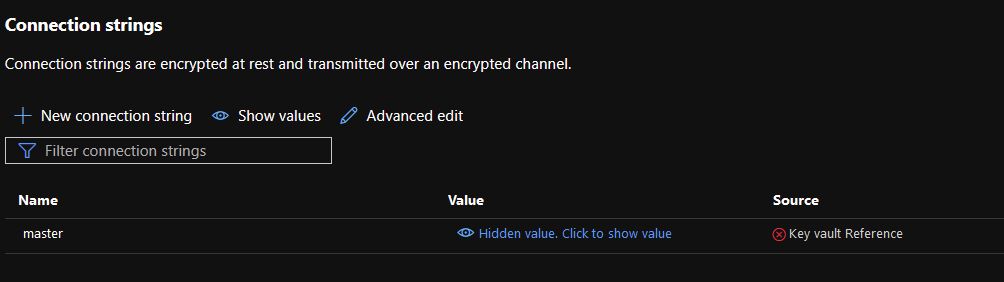
When you return to your App Service’s Connection Strings section, you should see a nice green check:

There you have it. You’ve successfully migrated your connection strings from the file system into a Key Vault. Yay Security!

Hi,
Nice post!
However, when adding values to Azure Keyvault, it does not allow dot’s (.) in the name of the secret.
E.g. Sitecore-ConnectionStrings-Exm.Master
I can’t see any way to change the name without breaking Sitecore?
Best regards,
Wilko
The name of the secret doesn’t have to match the connection string name, so you should replace the periods with hyphens. The value of the secret can have periods, however.
Thanks for this very useful blog. I managed to complete all the steps and moved sql connectionstrings to Keyvault for Siteore- SXA CM role. But when I do for Sitecore-sxa-CD role. The custom domain defaults to default sitecore homepage instead of custom site home page.
This doesn’t feel like a KeyVault issue as much as a Site Definition needing to have the right hostnames.